Animating the Cloud: Learning Adobe After Effects for AWS Content Creation
I’ve always been intrigued by the creative side of technology, particularly the animation capabilities of Adobe After Effects, a digital visual effects and motion graphics application widely used in the post-production process of film making, video games, and television production.
Despite my interest, there wasn’t a compelling reason to learn it until I began working with AWS. My experience in cloud computing grew as I built solutions and shared them on my YouTube channel, Hands On with Digital Den.
Recently, I was faced with the choice of either pursuing another AWS certification or diversifying my skills with Adobe After Effects, I opted for the latter. This decision is driven by a desire to significantly improve the AWS cloud content I create.
Adding After Effects to my skillset will enhance the quality and effectiveness of my AWS tutorials and explanations. This will allow me to create more engaging visuals, animated diagrams, and dynamic presentations to illustrate complex cloud concepts better. Ultimately, this combination of technical AWS knowledge and creative visualization skills will enable me to produce unique, high-quality content that stands out in the field of cloud computing education.
Technical Content Creation
Creating effective AWS educational content began with foundational tools and experiences. This section explores the initial stages of content creation, focusing on two key elements. TechSmith Camtasia for basic video production and the professional development opportunity at Cloud Academy. These experiences established the groundwork for understanding the potential of visual content in explaining complex AWS concepts, leading to the exploration of more advanced creative tools.
TechSmith Camtasia
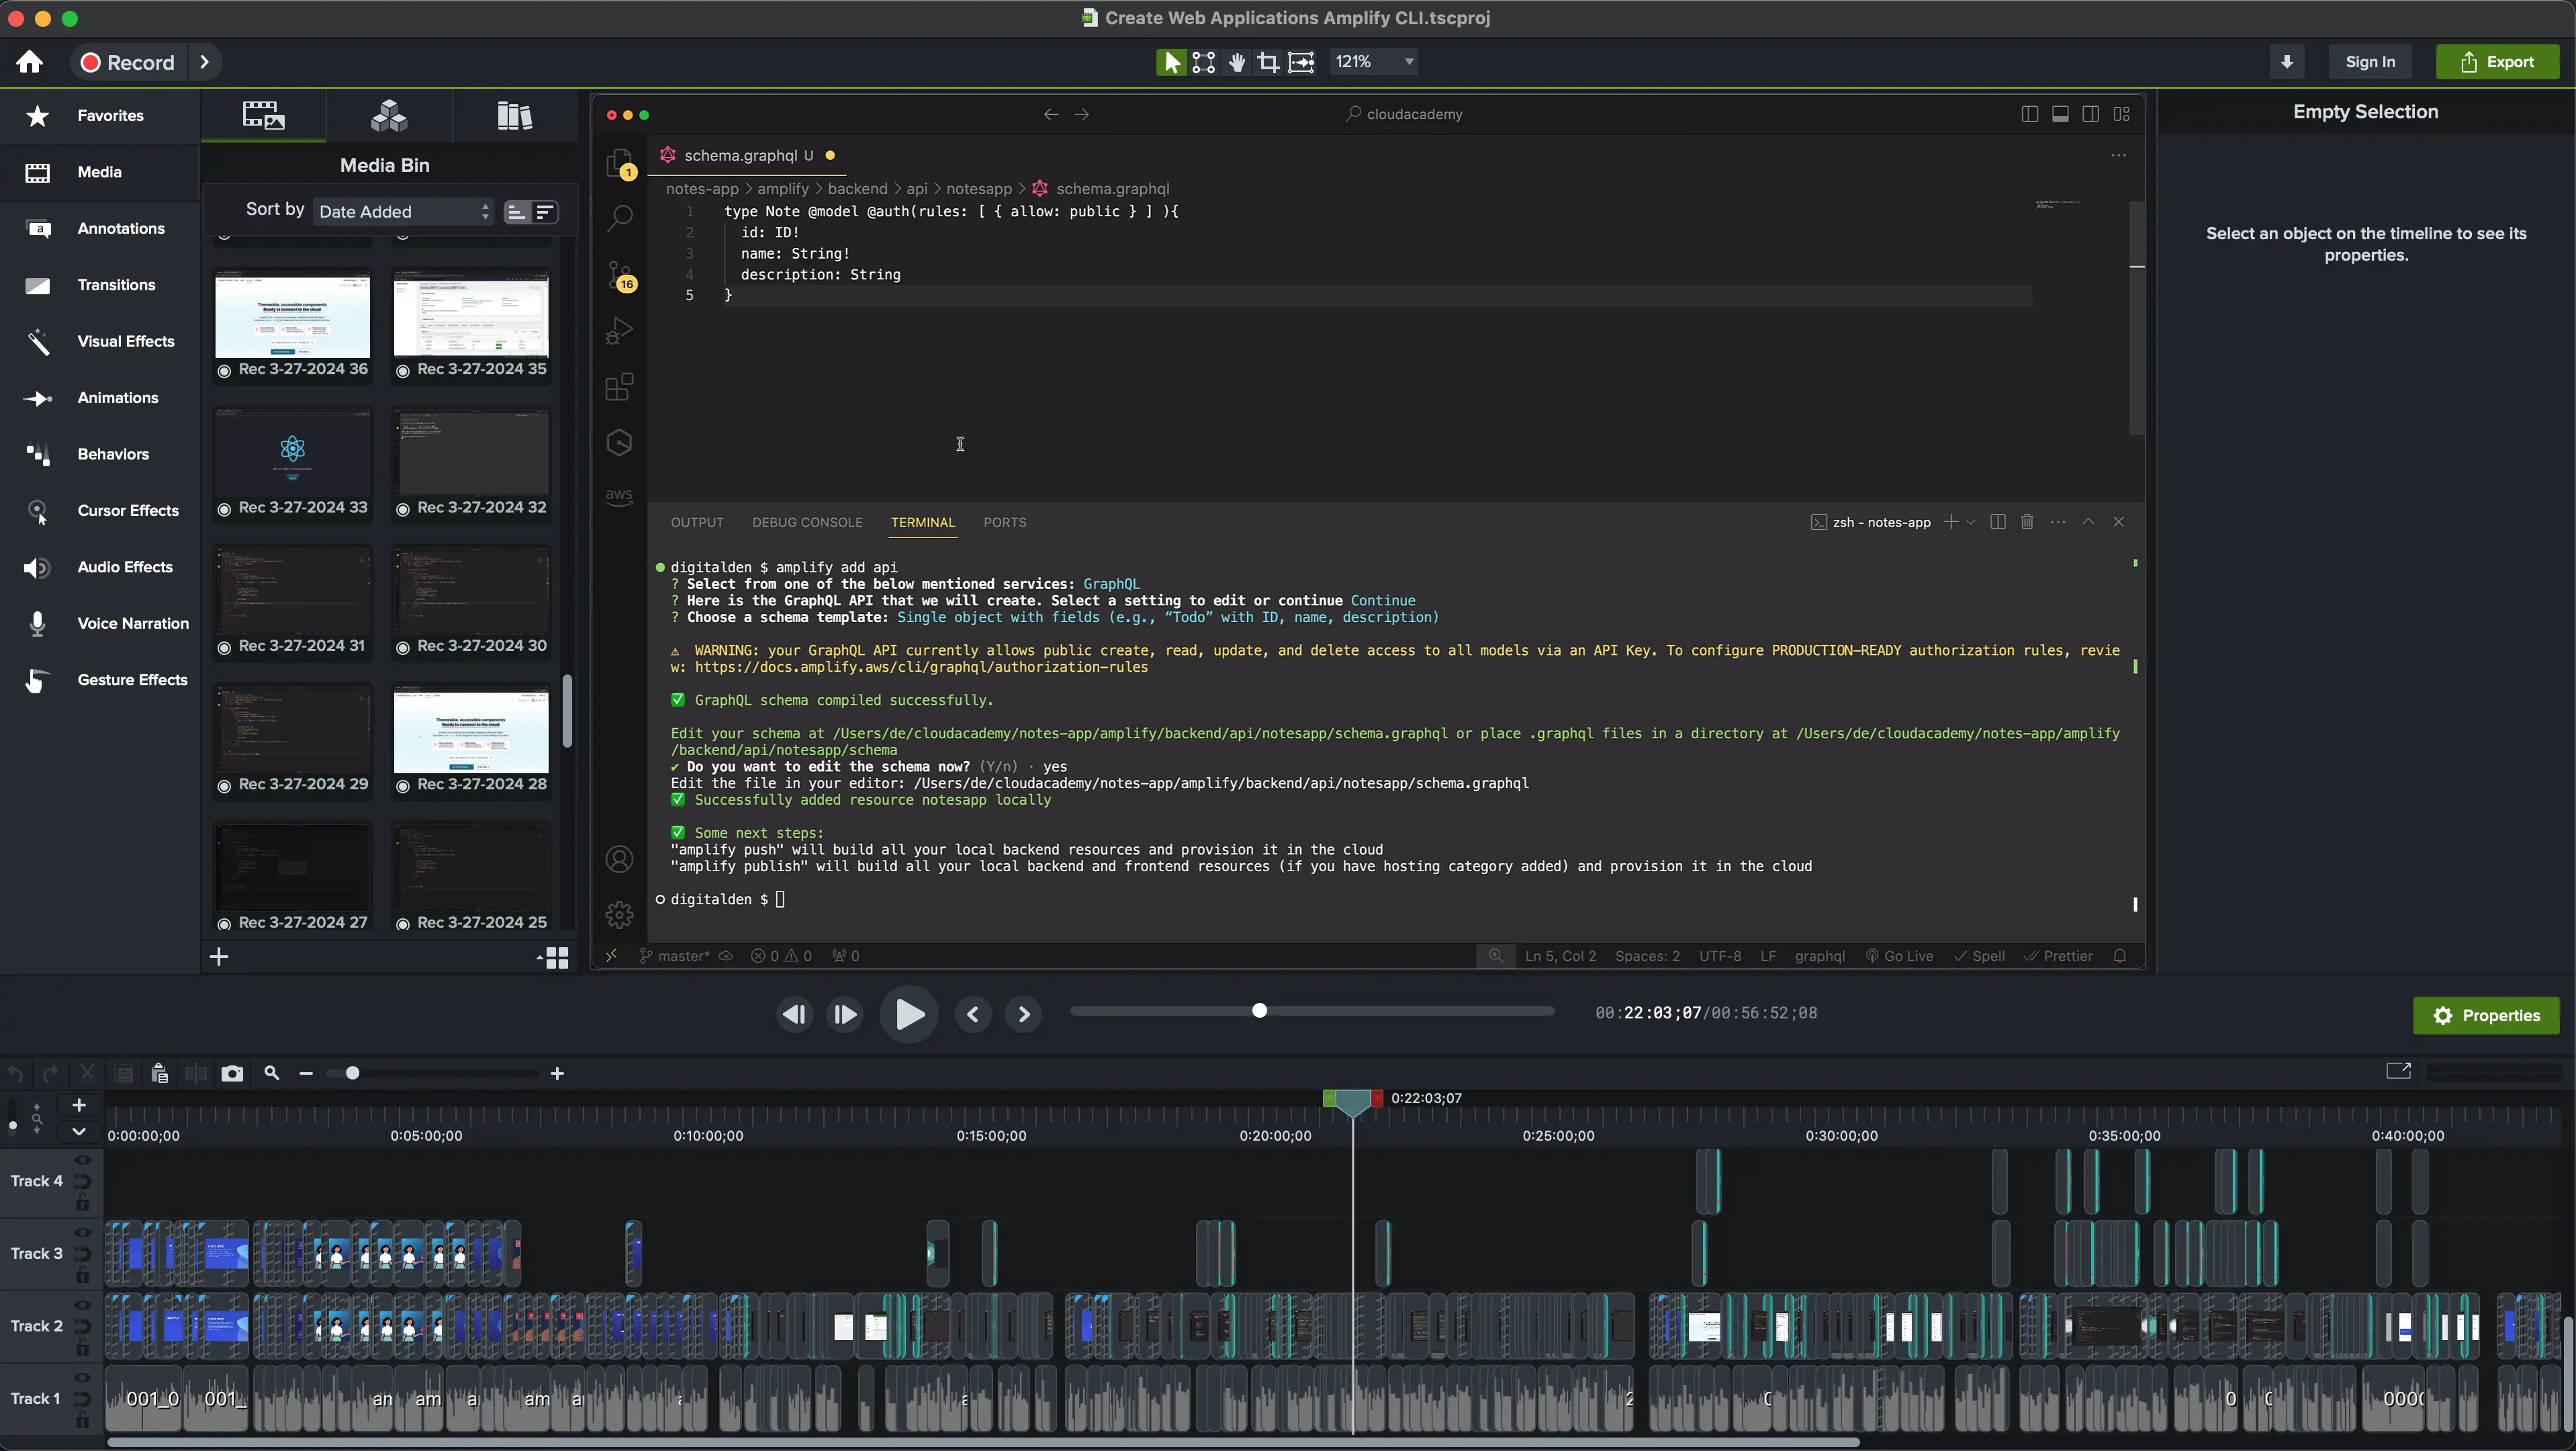
Camtasia has been my go-to tool for creating video demos. It allows me to record my screen, edit the footage, and add basic transitions and effects. The software’s ability to handle multiple audio and video tracks simultaneously makes it perfect for layering tutorial elements effectively.
Here’s a screenshot from a recent lesson I put together for Cloud Academy, captured during the editing process in Camtasia:
 Create Web Applications Using Amplify
Despite its strengths, I’ve found that Camtasia has limitations, particularly when it comes to creating more dynamic and engaging animations.
Cloud Academy
My passion for creating content eventually led me to a job at Cloud Academy, a company that specializes in cloud technology training.
At Cloud Academy lessons and courses created by content creators like me are transformed into animated explainer videos by a team of motion designers, graphic designers, and previs artists:
The high-quality animations at Cloud Academy motivated me to start learning Adobe After Effects to add similar animations to my videos. While my primary focus remains on producing high-quality AWS content, I aim to integrate animation clips throughout my hands-on demos to clarify complex cloud concept.
Fortunately, Cloud Academy provides a free subscription to Skillshare — an online learning community with thousands of classes for creative and curious people, on topics including illustration, design, photography, and video. It was there I found The Beginner’s Guide to Adobe After Effects by Jake Bartlett. This class was my starting block for animation.
Diving into Adobe Creative Suite
To enhance the visual quality of AWS tutorials, exploration of the Adobe Creative Suite became necessary. This collection of applications is widely used for graphic design, video editing, and web development. The following sections detail the learning process and application of three key Adobe tools:
- After Effects
- Illustrator
- Premiere Pro
Each tool improved different aspects of content creation, including animation, graphic design, and video editing, leading to more engaging AWS educational materials.
Adobe After Effects: The Beginners Guide
Jake Bartlett’s class, proved to be an invaluable resource. This comprehensive 6-hour class covered a wide range of essential topics, including:
- Resolution & Frame Rate
- Composition Setup & Parenting
- Pre Comps
- Anchor Points
- Animating with KeyFrames & Pre Comps
- Applying Affects
- Animating the Transition
- Camera Movement
- Looping & Exporting Animations
The class provides all necessary artwork, so there’s no need to design anything from scratch, instead you can focus on learning to animate using the assets provided for the project.
In the class project, I developed a looping animation designed specifically for Instagram, rendered in sharp 1080 x 1080 resolution as an MP4 file: Taco Tuesday
After finishing the class, I aimed to apply what I had learned by creating my own animation based on the class. Reinforcing my skills through practical application is how I best absorb new information. This project allowed me to practice the techniques discussed in the class and further integrate my understanding of visual effects.
Adobe Illustrator
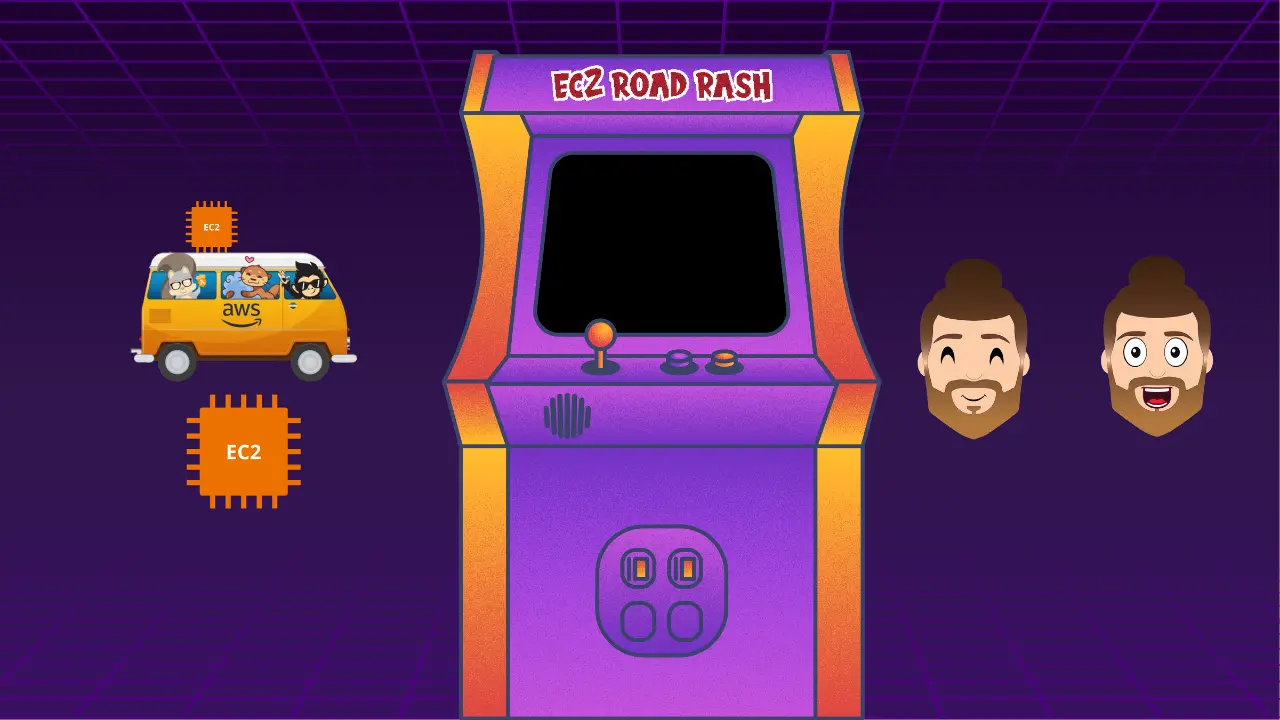
Adobe Illustrator is a vector graphics editing software widely used for creating and manipulating digital artwork. It excels in allowing users to produce designs with precision and scalability, making it ideal for both print and web media. I began a 7-day trial with Adobe Illustrator to learn how to tailor vector graphics for my animation project, EC2 Road Rash
Here are the specific changes I made:
- I renamed the arcade game to
EC2 Road Rashto better align with the AWS theme. - I designed new artwork, including an animated version of myself with alternating expressions—one with an open mouth and one with a closed mouth—to add a dynamic element.
- I created images of an AWS bus topped with an EC2 instance and a standalone EC2 instance image to integrate AWS concepts into the game.
- To achieve a retro aesthetic, I pixelated the images, giving them an 8-bit look reminiscent of classic video games.
Given that my primary platform for video sharing is YouTube, I adjusted the dimensions of the animation to 1920 x 1080 pixels, which is more suitable for YouTube’s format compared to the smaller Instagram size used in the class.
Animating the Wheels
The AWS bus image that I used in the animation was originally found at the AWS On Tour: Developer Tooling Edition Event
I liked the bus’s design and decided to incorporate it into my animation project. However, to add a dynamic element to the animation, I wanted the bus to bounce on its wheels, which required some modifications to the original image. To accomplish this, I first needed to modify the bus image to animate the wheels independently from the bus body. In Adobe Illustrator, I achieved this by:
- Creating a separate layer specifically for the wheels.
- Isolating the wheels and positioning them on the new layer.
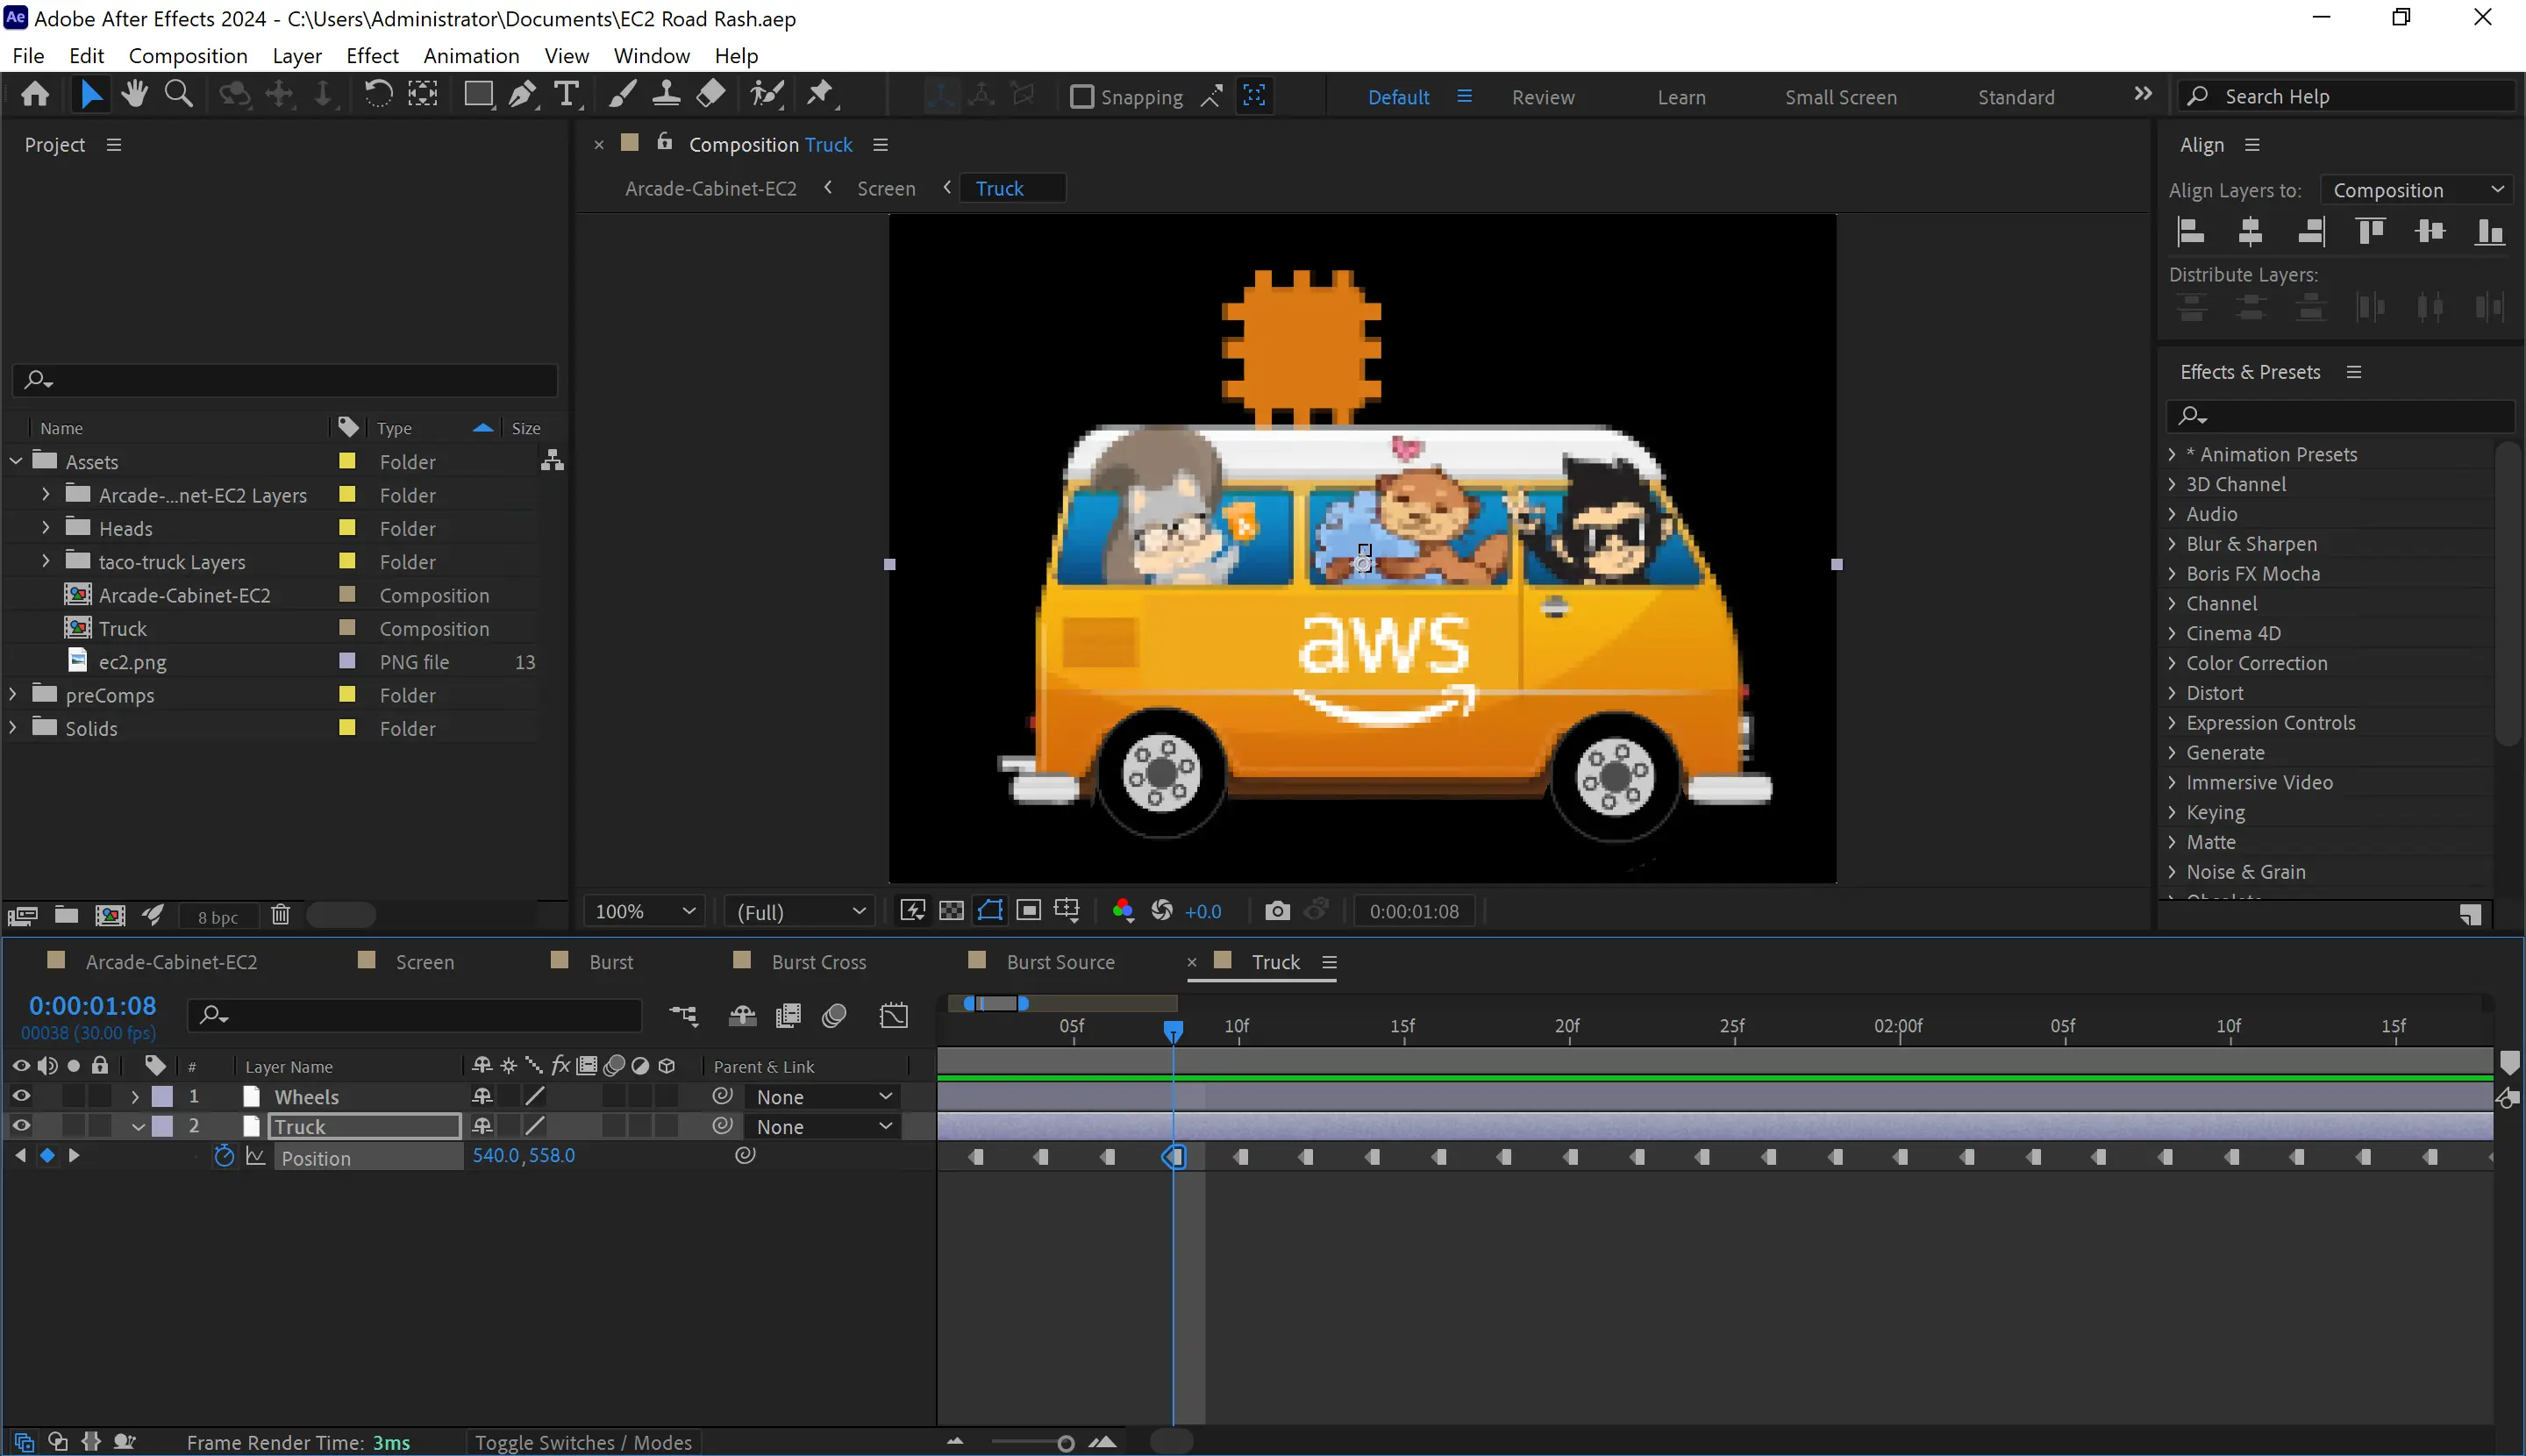
After making these adjustments, I saved the updated Illustrator file and imported it into Adobe After Effects as a composition. This process allowed me to access the truck.ai file as a composition in After Effects, where I could manipulate both the truck and wheels layers independently.
Within After Effects, isolating the wheels on a separate layer facilitated specific animations for the wheels while keeping the bus body steady:
- Layer Isolation: The wheels were placed on their own layer, allowing for targeted animations independent of the bus body.
- Position Keyframes: Keyframes were added to the wheel layer to simulate a bouncing effect, providing dynamic movement.
- Independent Movement: Layer separation enabled the wheels to move independently, mimicking the bus’s reaction to the road’s surface, which added realism to the animation.
Adobe After Effects
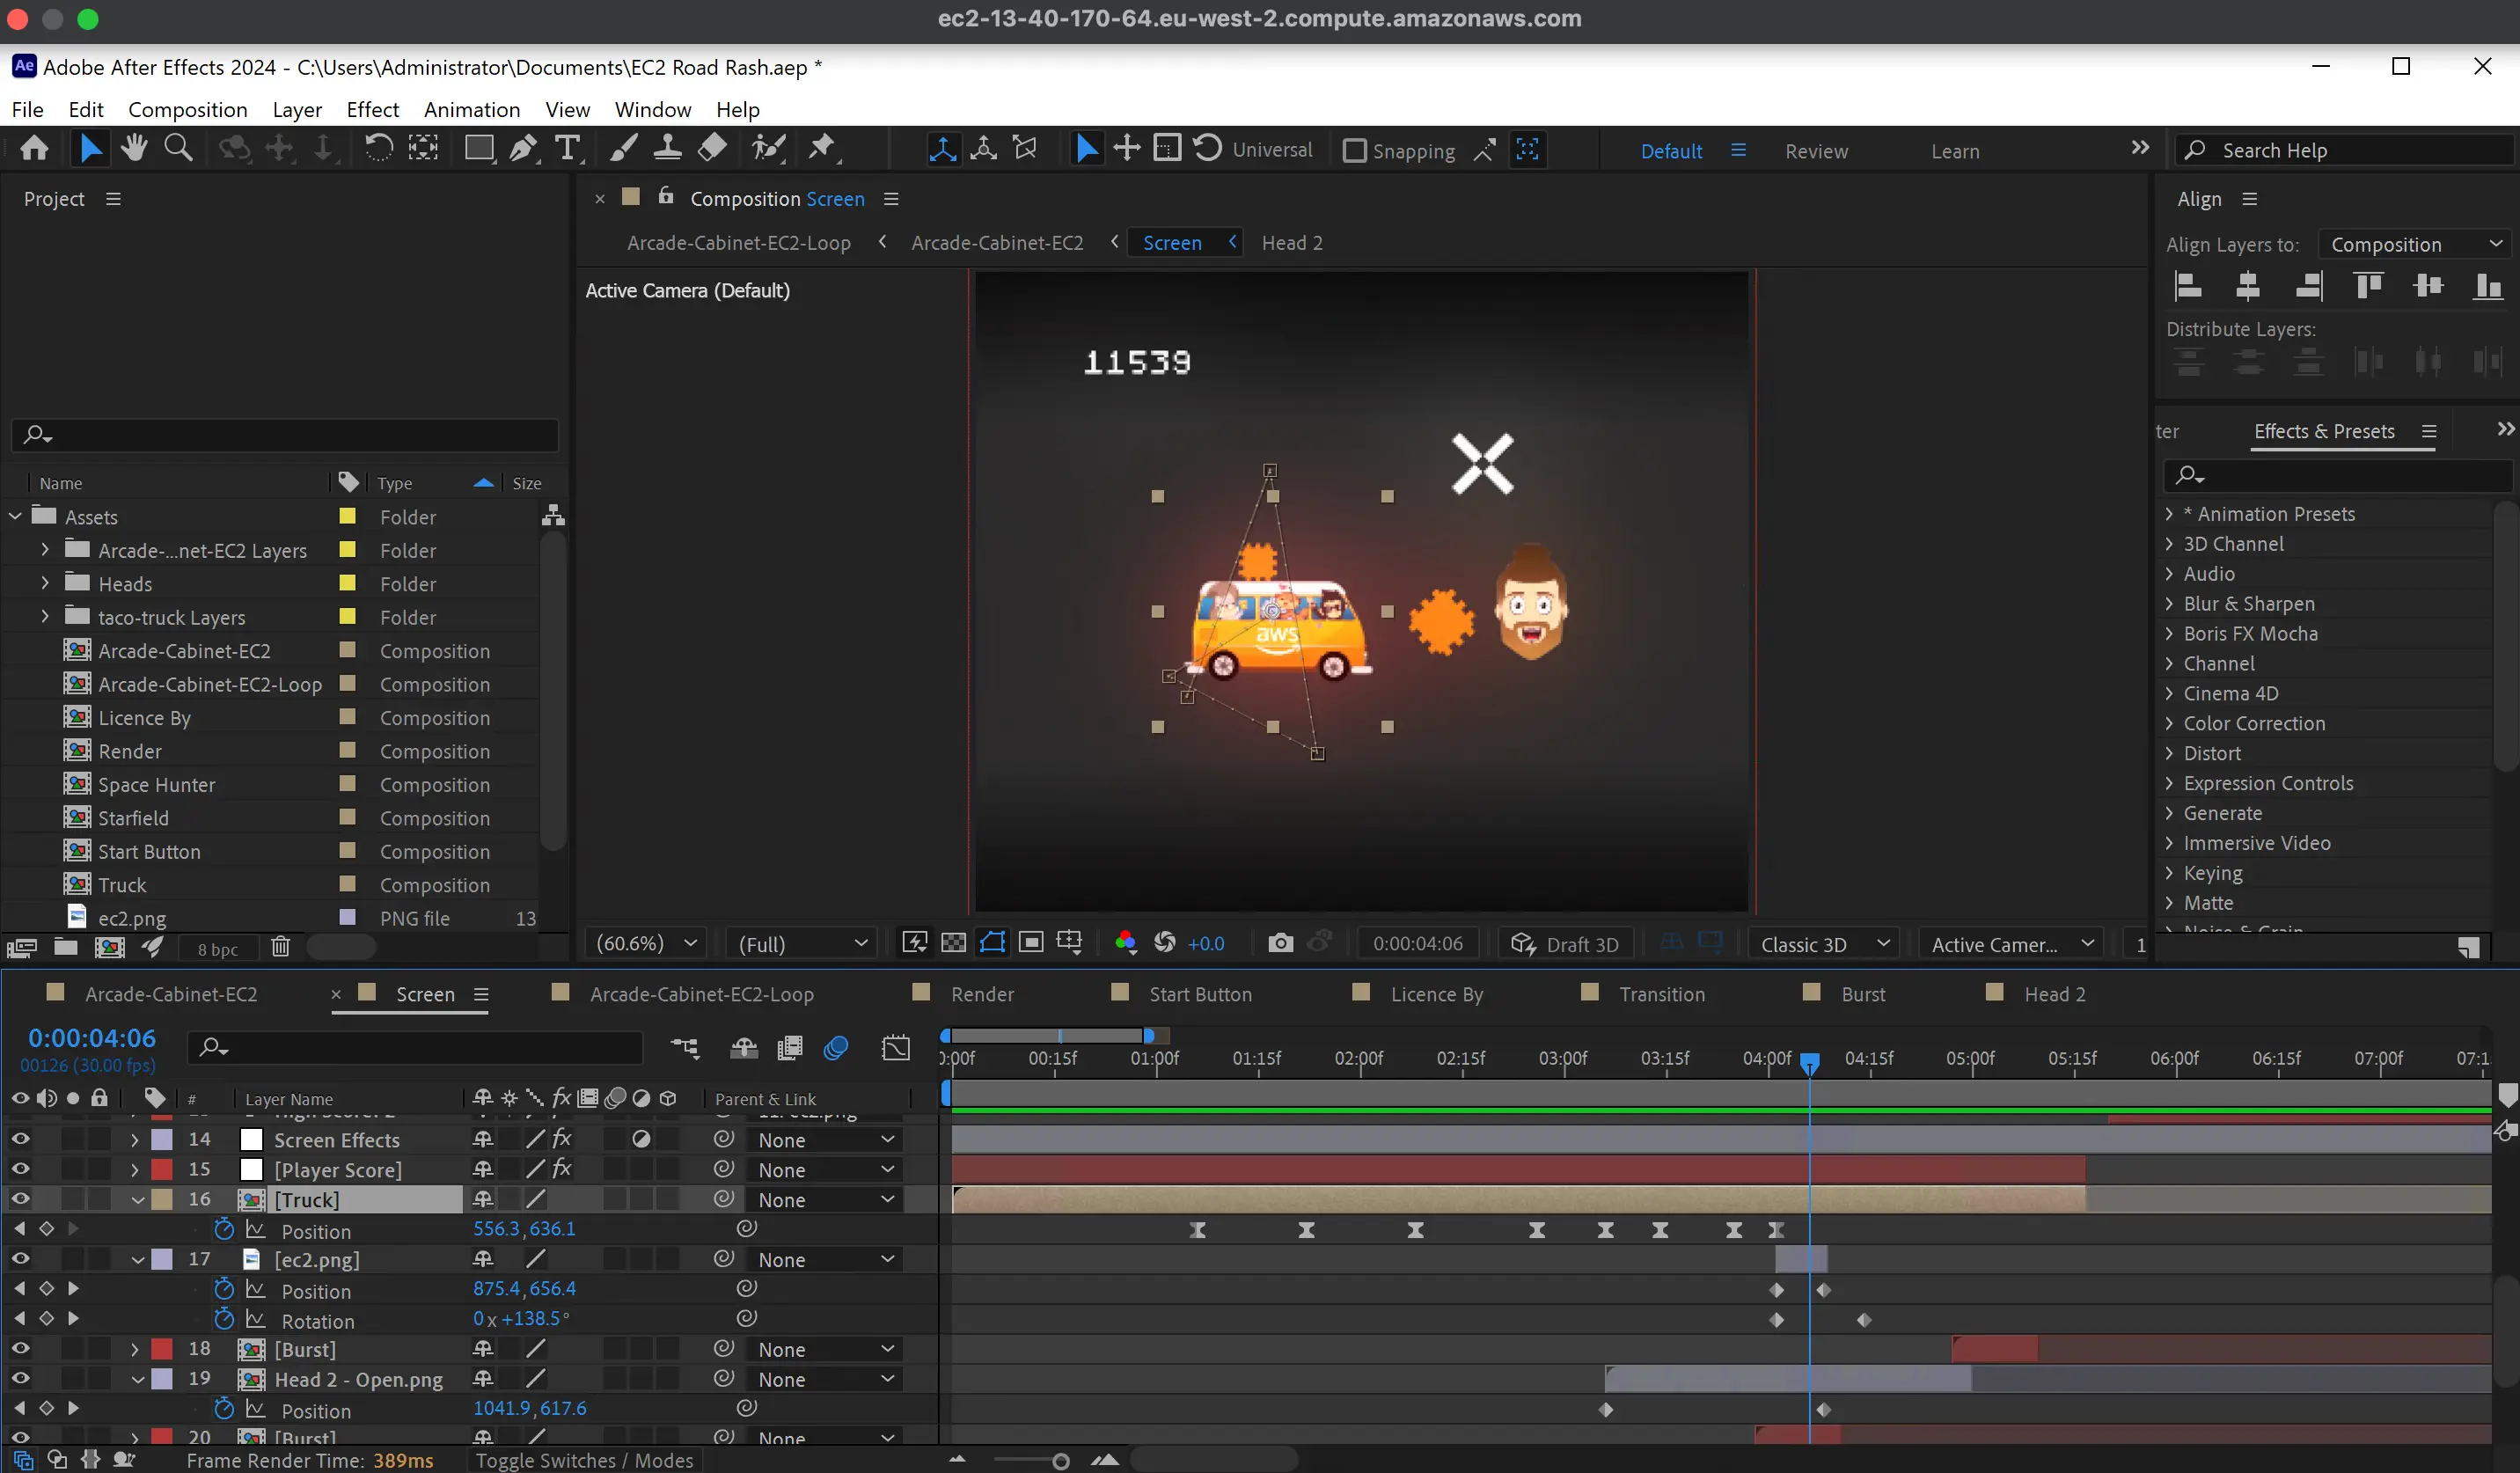
Having customized the graphics in Adobe Illustrator, I then moved on to animate these elements in Adobe After Effects to bring the arcade-style game EC2 Road Rash to life. This screenshot from Adobe After Effects outlines some aspects of my arcade-style animation project. Below is an explanation of the tools and effects visible in this image, demonstrating specific functionalities:
Animation Techniques Used:
- Keyframe Animation:
- The AWS bus was animated using position keyframes to simulate movement around the screen.
- EC2 instances were given a combination of position and rotation keyframes to create the effect of being thrown from the bus towards the character.
- Character Dynamics:
- The main character, designed to eat the incoming EC2 instances, was animated using opacity keyframes within a pre-composition to create an opening and closing mouth effect.
- Ease and Timing:
- Easy Ease was applied to the keyframes to smooth transitions and enhance the flow of movements, contributing to a more natural arcade game aesthetic.
- Visual Effects:
- An adjustment layer was added to incorporate several effects: CC Ball Action, Glow, and Gaussian Blur, all contributing to a retro arcade-style visual theme.
- Score Display:
- A player score display was integrated at the top of the screen, animated with the numbers effect to dynamically reflect the game’s score.
While this description covers the visible elements and effects in this screenshot, it is only a part of the overall project. The full animation includes additional techniques and details not shown here.
Adobe Premiere Pro
Following the animation process in After Effects, the project was brought into Adobe Premiere Pro for assembly. Adobe Premiere Pro is a video editing software designed for editing various types of media and used primarily for post-production work. I began exploring this tool with a 7-day trial, using it to add and synchronize sound effects with animations from After Effects.
A great feature of Premiere Pro is its ability to import After Effects compositions directly into the timeline, allowing for real-time updates without the need for rendering. This functionality streamlines the process of adjusting audio and visual elements simultaneously. As I continue to develop my skills in video production, I plan to utilize Premiere Pro to expand my capabilities in creating more polished videos.
In the resulting animation, the AWS bus launches EC2 instances, and the player uses a joystick to direct these at my animated character, who ‘eats’ the instances as they approach.
Here’s a look at my first animation created for YouTube
Leveraging AWS Computing Power
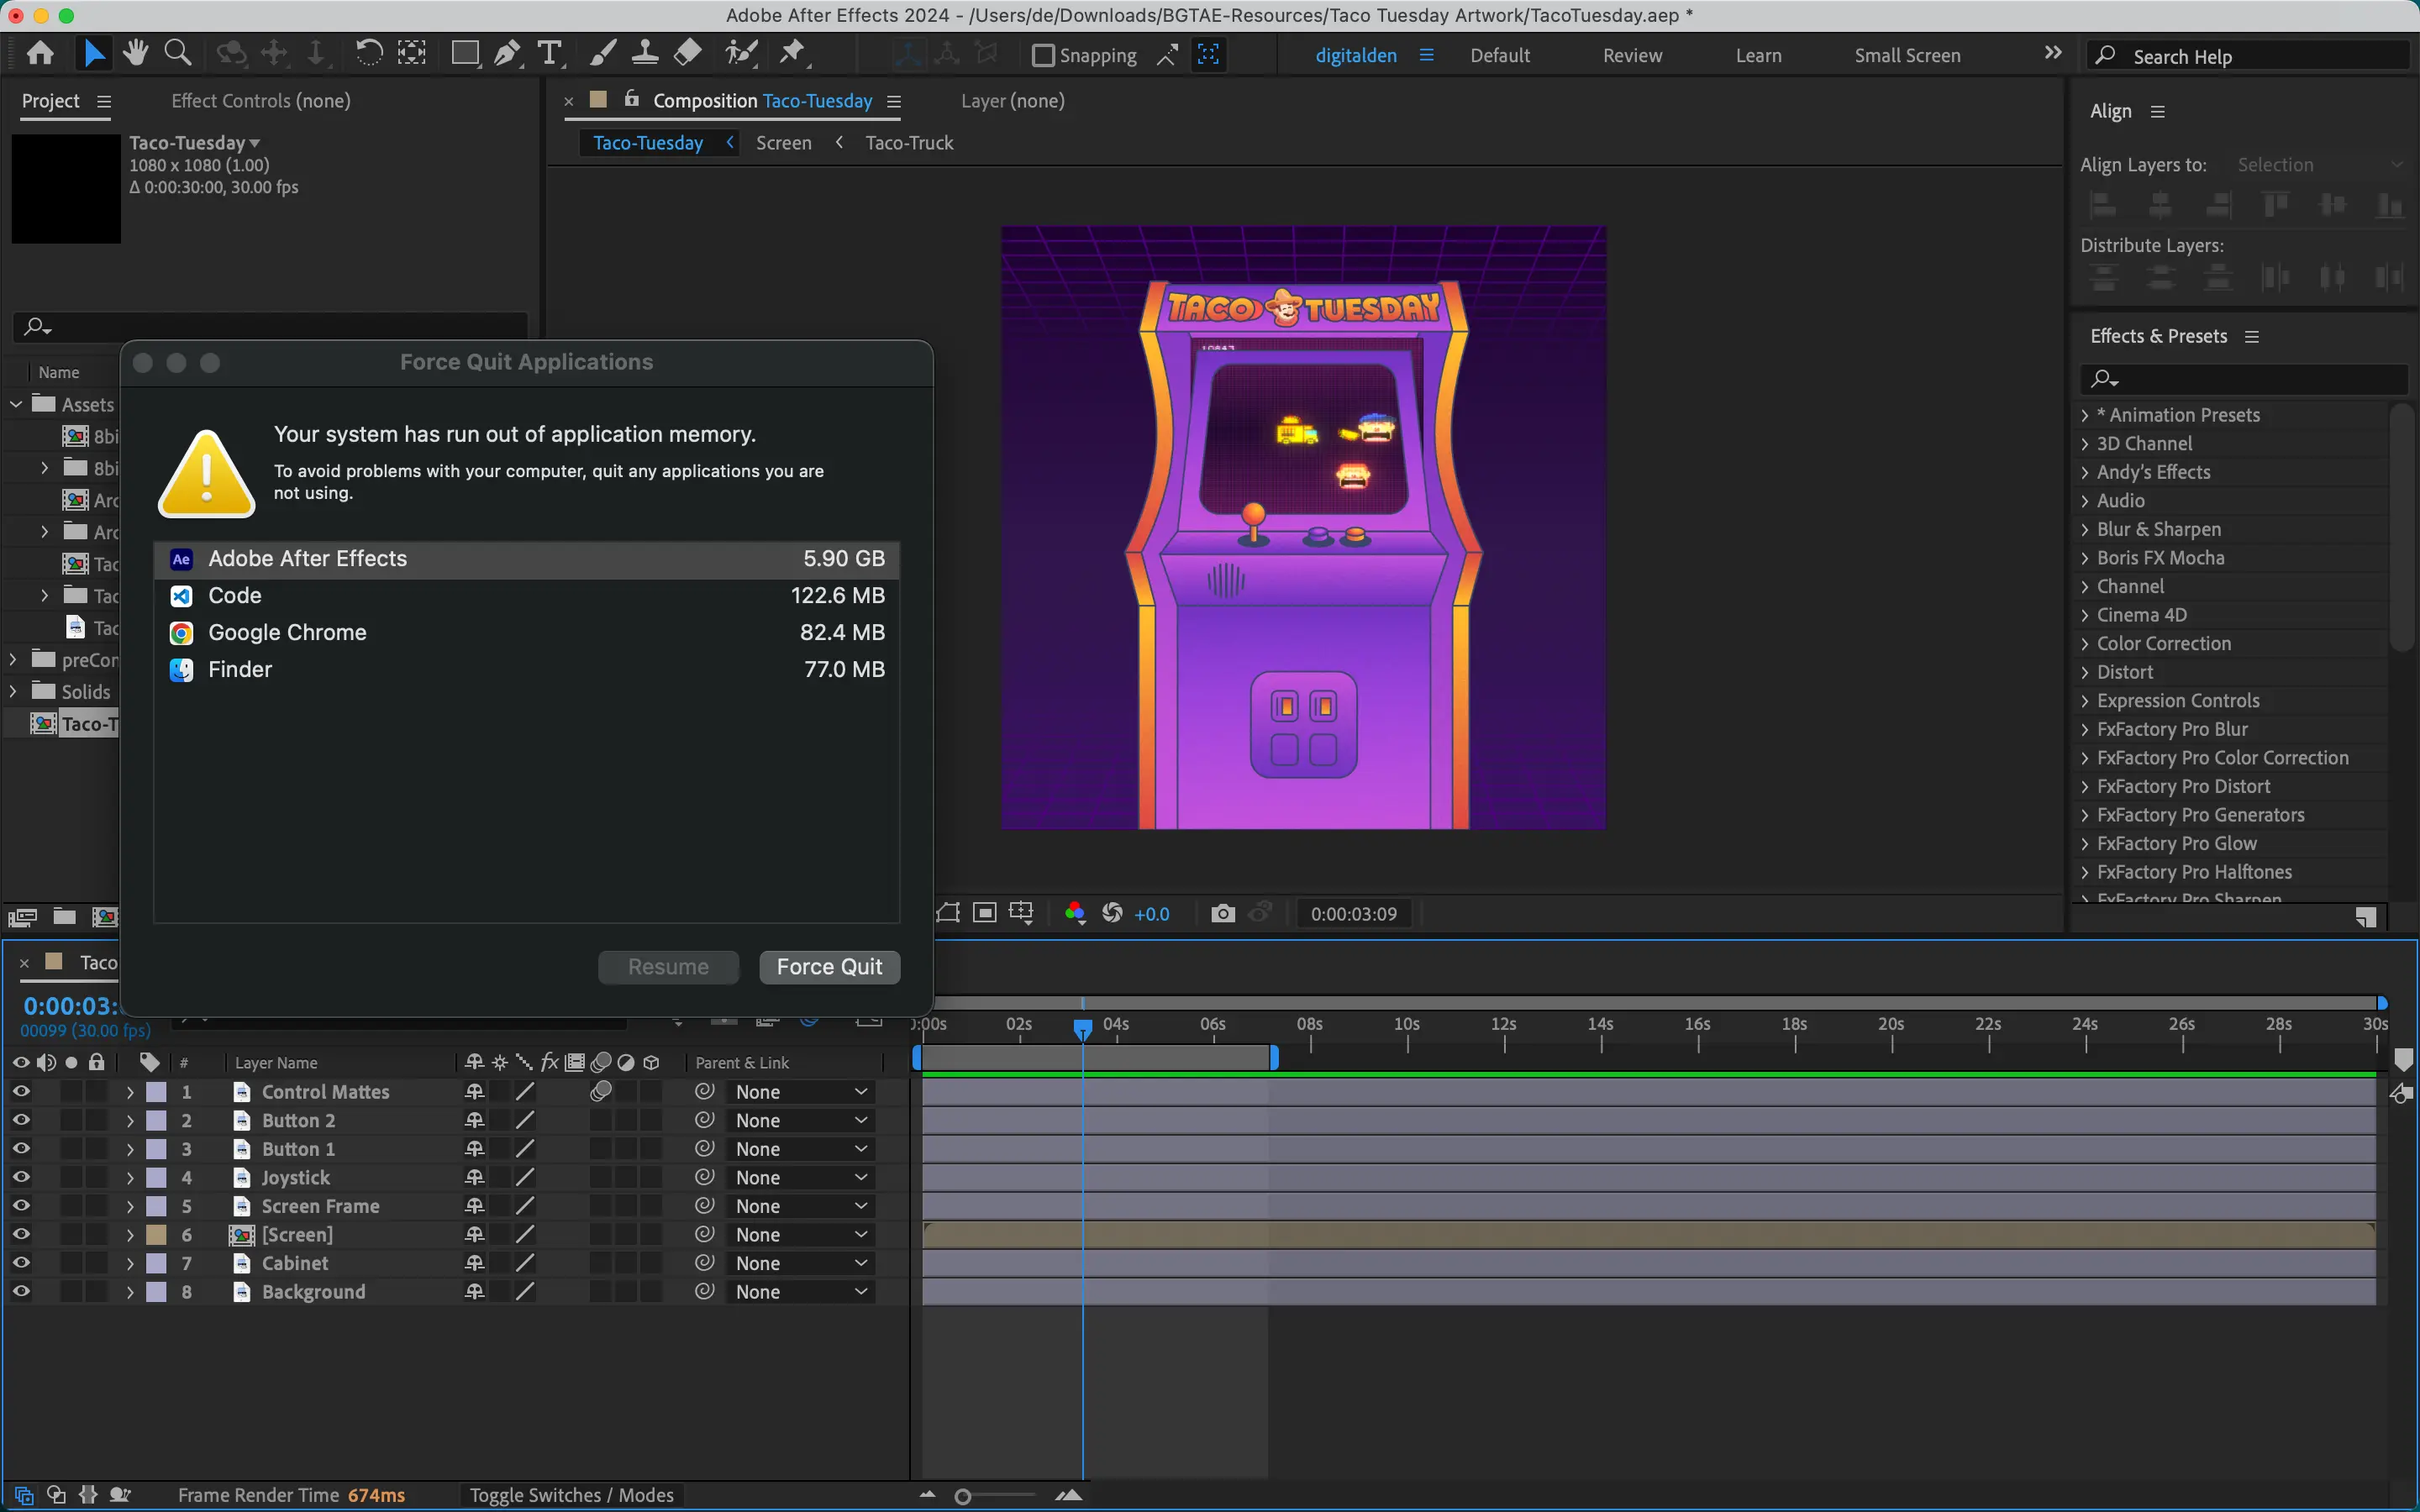
As my projects in Adobe After Effects grew more complex, incorporating additional effects and techniques, the limitations of my MacBook Pro became increasingly apparent. With the installation of applications like Illustrator and Premiere Pro, the device frequently ran out of application memory, operated slowly, and took a long time to render animations
Instance Selection
To address these challenges and accommodate the expanding scope of my work, I explored a solution that leverages AWS cloud computing power. Opting for a g4dn.2xlarge EC2 instance, tailored for graphics-intensive applications, proved effective.
| Instance Size | GPU | vCPU | RAM | On-Demand Price/hr* |
|---|---|---|---|---|
| g4dn.2xlarge | 1 | 8 | 16GB | $0.752 |
Upon launching the EC2 instance, I connected to it using Microsoft Remote Desktop from my MacBook. I installed the necessary NVIDIA drivers and Adobe Creative Cloud suite, including Adobe After Effects, Illustrator, and Premiere Pro. I then set up After Effects to optimize the use of the GPU.
By monitoring the Task Manager on the EC2 instance, I could see that the GPU was effectively utilized during the rendering process. This sped up rendering times and ensured that my local machine was free from the heavy lifting, preventing the application memory issues and lag I previously encountered.
Optimizing Storage with EBS Volumes
Despite the powerful EC2 instance, storage became a concern. The default EBS gp2 30 GiB volume provided was insufficient for my needs. Adobe After Effects generates and stores a significant amount of cache data during the rendering process, which can quickly fill up available storage space.
Recognizing the importance of sufficient storage for an efficient workflow, I opted for a more high-performance solution — a io2 100GB volume. This choice offered higher IOPS (input/output operations per second) and throughput, ensuring smooth operation and minimizing delays in accessing and saving cache files.
While the io2 volume provided excellent performance, I noticed that the EBS volume was costing $8 a day, which wasn’t cost-effective, especially considering it was only used for caching purposes. To address this, I replaced the io2 volume with a 100GB gp3 volume. This change didn’t compromise performance and was significantly more cost-effective, costing only a fraction of the price.
The g4dn.2xlarge instance with Windows_Server-2022-English-Full-Base AMI, and 100GB gp3 volume, ran at an approximate cost of just under $2 per hour. This setup serves as a cost-effective solution, especially considering my available AWS credits and my current preference to avoid investing in a new computer.
Setup Tutorial
Setting up this environment involves several steps and considerations. If you’re interested in replicating this setup or learning more about the process, I’ve created a detailed video guide. This tutorial walks you through the entire process of setting up an optimized environment for Adobe Creative Cloud and After Effects on an AWS EC2 Instance equipped with NVIDIA GPUs. Alternatively, you can view the documentation.
Creating My First Explainer Video
After setting up the AWS environment and becoming more familiar with the Adobe Creative Suite, I was ready to create my first explainer video. This video was particularly special as it was designed to celebrate my achievement of becoming an AWS Community Builder. I followed a structured approach that helped me organize my work and ensure a smooth creation process.
Workflow
- Storyboard Creation
- I started by creating a detailed storyboard to visualize the flow of the video.
- This storyboard served as a blueprint for the entire animation process.
- Transition Planning
- I carefully considered the transitions between each storyboard frame.
- This step involved planning out animations before moving into After Effects.
- Manuscript Writing
- I wrote a manuscript for the video, detailing the narration that would accompany the visuals.
- Asset Preparation
- I prepared all necessary Illustrator files for use in the animation.
- After Effects Setup
- I set up my After Effects project, ensuring all settings were optimized for my needs.
- Animation Process
- Working through each storyboard frame, I applied various animation techniques.
- Special attention was given to the transitions between different sections of the video.
- Audio Integration
- I used Amazon Polly to generate voiceovers for the manuscript in multiple languages: English, French, Italian, and Spanish.
- These audio files were then integrated into the animation.
- Finalization and Export
- After completing the animation and adding the audio, I reviewed and finalized the video.
- The project was then exported as an MP4 file.
Using Amazon Polly to create multilingual voiceovers allowed me to make the video accessible to a wider audience and showcased the power of AWS services in content creation.
Project Outcome
My goal was to create a short, engaging explainer video that effectively communicates my journey to becoming an AWS Community Builder in a visually appealing way. This video would serve as a celebration of my achievement and as a potential portfolio piece to showcase my AWS and video creation skills.
The final result was a concise, animated explainer video in MP4 format, available in four languages, ready to be shared with the AWS community and beyond.
Here’s the final explainer video I created to celebrate becoming an AWS Community Builder:
Behind the Scenes
To provide insight into the creative process behind this explainer video, I also created a time-lapse video that captures my workflow as a motion designer:
Motion Designer’s Workflow in Explainer Video Time-lapse condenses approximately 2.5 hours of work into a 7-minute overview. It demonstrates the step-by-step process used to bring an explainer video to life using Adobe After Effects.
This video showcases both the technical aspects of creating an explainer video and provides insight into the creative decision-making process and attention to detail required in motion design.
Applying After Effects Skills to AWS Content
After creating my first explainer video and gaining confidence in my After Effects skills, I was ready to apply these newly acquired abilities to create AWS-specific content. This led to the creation of my first AWS-focused video using After Effects:
Creating this AWS-focused content allowed me to merge my technical expertise with my newly acquired animation skills, resulting in a more engaging and effective learning resource for the AWS community.
This project showcases how the creative skills I developed with After Effects can be directly applied to create valuable, technical content with AWS. It exemplifies how combining cloud computing knowledge with visual storytelling can enhance the learning experience for others in the field.
Summary
My path in cloud computing and creative content creation has been one of continuous growth and skill expansion:
AWS Foundations: I began by building solutions with AWS and sharing my knowledge on my YouTube channel, Hands On with Digital Den.
Skill Diversification: Recognizing the potential to enhance my content, I made the decision to learn Adobe After Effects instead of pursuing another AWS certification.
Learning After Effects: I started with Jake Bartlett’s comprehensive class on Skillshare, learning the basics of animation and visual effects.
First Animation Project: I created my first animation, EC2 Road Rash applying the skills I learned to create AWS-themed content.
Overcoming Technical Limitations: To handle more complex projects, I leveraged AWS computing power, setting up a g4dn.2xlarge EC2 instance optimized for graphics-intensive applications.
Celebrating Achievements: I created an explainer video to mark becoming an AWS Community Builder, incorporating multilingual voiceovers using Amazon Polly.
Behind-the-Scenes Insight: I produced a time-lapse video showcasing the creative process behind making an explainer video.
AWS-Specific Content Creation: Finally, I applied my After Effects skills to create an engaging introduction video for my tutorial series on the Cloud Resume Challenge, setting the stage for a comprehensive exploration of AWS, Terraform, and GitHub Actions.
This progression demonstrates how integrating creative tools with cloud computing expertise can lead to more engaging and effective educational content in the tech field. By continuously expanding my skill set, I’ve attempting to create unique, high-quality content that stands out in cloud computing education.
